Followers

Sunday 5 March 2017

Sugared Pretzels

BAKE #6: SUGARED PRETZELS

Hi everyone, I am finally back baking again. That one was a long stretch! My 2-3 week deadline isn't quite working out like I had hoped it would! I missed a whole month! Tsk, tsk! So, I must find more time somewhere! I recently started a new job, and have a few other projects on the go, so I'm afraid I have got behind, once again! However, my family has a busy period coming up, so baking will be coming up on the agenda... not just for eating, but for the freezer too! (For those days when our "sweet tooth"/ "sweet teeth?" are calling! :) Speaking of the freezer, I had taken out some of the Cheese & Olive Scone Bake from the freezer, which I had made for my last entry. It tasted so fresh, and was so soft, so it had froze really well! Just in case you decide to make it for yourselves.

So, for this week's bake I decided to make Mary's Sugared Pretzels, featured on page 223 of her Baking Bible. I was immediately pulled into it because the ingredient list was so short, and basically everything you would have on hand in your kitchen on an everyday basis. It looked an all around, quick and easy recipe. So, was definitely a must for a weeknight bake! Or, if you have a call from your family or friends that they are stopping by your house in an hour for tea - they are perfect! Especially then, as they are fresh and hot from the oven.

I started off making my pastry first. Such simple ingredients, so handy! Flour, butter, sugar, eggs, and vanilla. Once I had the pastry formed, I wrapped it in Saran Wrap, and let it chill in the fridge for around 1/2 an hour. Our family dog was watching me work in the kitchen that night!


About 15 mins, until the pastry would be ready, I preheated the oven. Mary calls for a 180 degree Celsius oven with the fan on, which converts to a 400 degree Fahrenheit oven with the fan.

Once the pastry was ready, I turned out onto a slightly floured countertop, and separated into 14 small balls. Mary says the recipe calls for 16 pretzels, but I found I was only able to come up with 14 - and they were still quite small. I rolled them out into long, 1/2 an inch sized little log shapes, and curled the ends around to form a 'pretzel' shape, when really they looked like very inconsistent, attempted knots! :)


Once you have your tiny pretzels done, pop 7 or 8 onto each, slightly greased, cookie sheet.


I baked them for the exact time Mary called for, 8 minutes was just right.Take them straight out of the oven to a cooling rack and dust with icing sugar. I often thought later, some cinnamon mixed with white sugar would have been nice for dusting the tops too. Some of each would be nice for serving at a tea.


I was so happy that this recipe was so easy. They are very cute, and reminded me of sweet treats like the "Two Bite Brownies" that we have in the bakery sections in Canada. I must say though that they did surprise me, as they are more of a shortbread cookie, than the soft texture of a pretzel. Perhaps, again, this may be a difference in Canada. I was expecting a soft, sweet, dough like pretzel. However, they are much more of a dainty, knotted cookie. I think I would make them again, but they are really the best served on the day. The next day is fine too, but I wouldn't leave them any longer than that really. Well Mary, I think we have different ideas of pretzels, but yours is definitely the sweetest one!

See you all in a little while!
I will end with "Ready, Set, BAKE!"

~*Next Bake Coming Soon*~

Friday 27 January 2017

Cheese & Olive Scone Bake

BAKE #5: CHEESE & OLIVE SCONE BAKE

Hi everyone! So, I have once again finally made it back to visit you all and tell you about my latest bake. Unfortunately, I am late again...new years resolutions are already slipping! My goodness! I just realized today actually, that at this rate, pretty much one bake every month as it is turning out to be... I may finish this baking challenge in perhaps... 20 years from now! :) Oh my! That can't be right! Hint, there are over 250 recipes in her book. Oh dear... but I am having fun on this baking journey. One of my favourite quotes is "Life is a journey, not a destination." So, if I do end up taking 20 years or more to finish - that's ok. :)

So for my bake this week, I felt like making something to accompany supper... and that turned out to be Mary Berry's Cheese and Olive Scone Bake from Mary Berry's Baking Bible - page 325. It sounded savoury and tasty, paired along with a slice of salmon, potatoes, and a strawberry salad. So, I was definitely looking forward to it. 

I learned from this recipe, and expanded on my vocabulary. I also had some hints and tricks from my Mum over the years too in regards to making scones. Always use the end of your fingertips when rubbing the butter into the flour. This is because your fingertips are much cooler - you also want to work the dough as lightly as possible. This will help make your scones light, fluffy, and airy. You don't want to overwork the dough if you can help it. 

Starting out, I put the oven on at 425 degrees Fahrenheit. Mary called for a 230 degree Celsius oven which converted to 450 degrees Fahrenheit. But I thought I would try it a little lower, and without the fan. (I have never baked anything that high actually, and I think I had fears it would burn very quickly). I then greased a 9x13 metal pan. I measured the flour, baking powder, and salt into a large mixing bowl. (I added a little less salt than Mary called for). I then rubbed the butter into the flour mixture until it looked like breadcrumbs. I then grated my cheese, there is quite a bit in this recipe! You will think it's a lot, just like I did! It is worth it though, so stay true to the recipe :) 


Chop up some olives... I ended up using less than Mary's measurements...but that is also partly because I ran out too! Mary calls for black olives, I used canned black olives, but it wasn't nearly enough. So I ended up using a combination of black and green olives. I used the leftover green olives stuffed with pimento paste that I had in a jar. They still didn't measure up! Literally! :) But, as it turned out, they seemed to be just fine in the loaf - they didn't overload it. 


This is where I learned the word that would have made my scone bake a disaster, if I hadn't understood it properly right at that moment! This word, oblong, seemed to boggle me! I'd never heard it before. In my mind, I thought it meant a long roll - like when you roll up cinnamon bun dough to slice it. Mary says in the recipe..."then roll out on to a lightly floured work surface to an oblong to fit the tin." For some reason, in my head, I was thinking of a long roll just long enough to fit in the tin. If I had also taken proper time to read her description of the recipe, I would have realized it was flat. Mary's description is "Making one large scone if fastest of all, as you don't have to roll and cut out the mixture." Oh, Katrina. I suppose I was hungry, saw the title, and thought, "Oh, this will be great for supper!" Jump to ingredients, and directions. 

If there is one lesson I have got to learn quickly in this challenge, it is to take time and read the recipe top to bottom. One I keep forgetting. So, after a long discussion with my Mum on what an oblong is, a rectangle basically, two short and two long sides, I figured out to roll out my dough mixture lightly with a rolling pin. I often gently shaped the sides with my hands too. 


Once it fits your pan, lightly brush it with milk. I'm still not sure why really, and if Mary Berry was in front of me I would ask her why! :) If anyone knows, please write me in the comments. I think it could be so the top of the scone will still be a little moist, so that when the parmesan cheese is added on later while it is baking, maybe it sticks on better? I'm not sure, but would love to know why as I find it really curious! So, anyways, Mary called for a 15 minute bake before adding the parmesan cheese topping, and then baking 5 minutes more. The time turned out perfectly for me at 425 degrees. 

It was lovely and soft, and raised quite nicely. I then understood that if I hadn't rolled it out flat for the pan, and kept it in a long roll, it would have risen extremely high, and would not have baked properly at all, and would have most likely turned out to be a very sticky mess. So, oblong, I understand you now! 


I forgot about my final photo! I was so excited to try some when it was hot and fresh, and with some real butter of course! I also didn't read the part where Mary said "mark into 12 squares," before putting in the oven. But, I think in the end, it could be a personal choice, if you would like to do that before or after. For me, I ended up cutting half and freezing it. It was a large scone, and with ample for supper, breakfast and lunch for tomorrow, I thought it was best to freeze some for another day. 

I will be making it again one day for sure, but maybe when we are having friends or family over for supper. It would make a great dish for large family gatherings, where everyone can still reach up for seconds. 

I hope you enjoyed this bake. See you in a little while. 
I will end with "Ready, Set, BAKE!"

~*Next Bake Coming Soon*~


Monday 2 January 2017

Chocolate, Brandy, & Ginger Cheesecake

BAKE #4: CHOCOLATE, BRANDY & GINGER CHEESECAKE


Happy new year everyone! Welcome 2017! Another year has flown by... I guess they all do to some extent :) This year has been a year of ups and downs, but has given me lots of room to grow and try new things - such as this blog and my very own baking challenge! I am excited to see how all of these baking adventures will unfold in the new year.

I hope you all had a wonderful Christmas. I wanted to include a picture of my own Christmas Cake, which I had made last Christmas (2015). My Mum and Grandma's recipe. I had so much fun decorating the first Christmas cake I had ever made, and so I wanted to share it with you.


Anways, this time around, I am extremely late with my latest blog entry. Due... probably over around a good two weeks I would imagine? I had actually made a few more batches of Mary's Gingerbread Men recipe for family and friends, and my Mum had made a Christmas cake, so I hadn't really had the gumption to try any new recipes during the holiday season.  

But, new year, new start! So, I am now "hopefully" getting back on track!

Well, for new year's day my sister cooked my family a wonderful meal, crown pork roast, and it was so delicious. We were spoiled! As agreed, I was responsible for bringing the dessert. I have been wanting to try this cheesecake recipe for quite some time now, and thought new year's day was the perfect opportunity. After all, it did have a small helping of liqueur in, which is always needed to ring in the new year! I had such high hopes for this cheesecake... but I am sorry to say that it was not my favourite, Mary Berry! I will explain why... and I am pretty sure I mucked up in the recipe somewhere along the way. So it hadn't been a great start to my baking challenge of the new year, but I knew the further I got into this book, the more challenges I would face! I guess that is why I have called it a baking challenge. :) I felt very, very flustered throughout this recipe, and I didn't even have to bake it! It was a no-bake recipe! :) Anways, here is how it went...

I should have read through all the steps in my recipe first. Read the whole thing through, so that is another rule I learned in baking! For me anyways! You must read the ingredients, AND all the steps start to finish. #1- so you know what you're getting into, and #2 So you can prepare things ahead of time. Lesson learned. :) This recipe is featured in Mary Berry's Baking Bible, pages 374-375.

So I probably went wrong with her first step in the book - use an 8" loose-bottomed/springform tin. I didn't have one, so I used a 10" springform tin. "This will be fine..." Uh-huh. My cake would have been much denser, and had much more height if I had listened. So I'm hoping in the new year I will be able to buy myself an 8" cake tin. Hint- I looked ahead in her book and she does use 8" tins quite frequently. 

The base turned out wonderfully, ginger snaps, butter, and demerara sugar. I melted the butter, sugar, and combined the crushed ginger snaps in a small saucepan, and pressed into my cake tin, which I had to spread out finely, so it made for a very thin base layer really. My fault! :)


Letting it cool, and set in the pan, I moved onto melting the chocolate in a glass bowl, over boiling water in a pan. I used baking chocolate squares which had 54% cocoa. Stirring regularly, it melted quite nicely. So far so good, I thought! Next, I needed to prepare the gelatine for my cheesecake mixture. This was where I fell apart... still not sure what the right quantity would be. Maybe there is a difference in gelatine between Canada and England.

I won't include Mary's measurements, as I worry about copyright laws, etc... but I originally had added 3 packets of gelatine, as I figured this weighed up on the scale to the measurement of gelatine she had called for. This is what it looked like when I had dissolved it in the cold water...


Mary said it was supposed to take 10 mins to "sponge," but it looked like this right away! So I knew it wasn't right. So I decided to try only 1 packet of the gelatine and it looked like this after 10 mins...


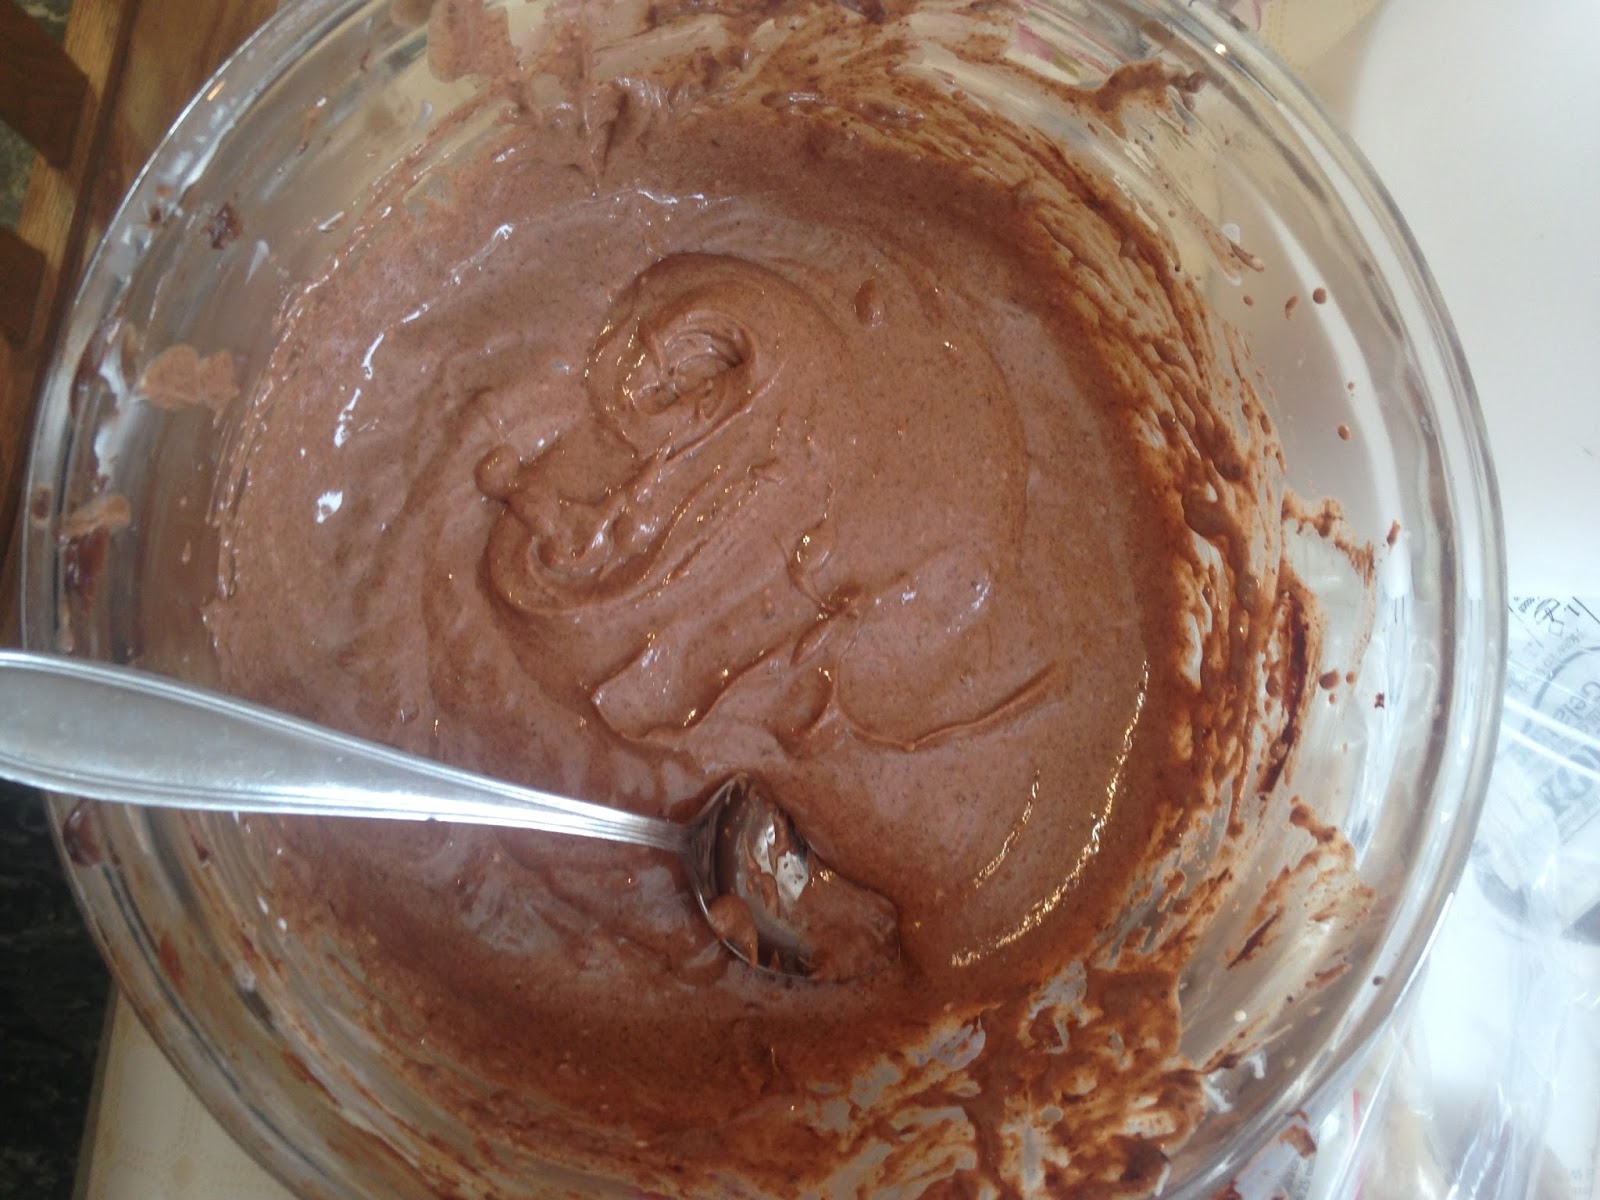
It definitely looked more airy and spongey, so I took this as a good sign. Next step was to position the gelatine over a pan of simmering water until it completely dissolved, or I thought of it as 'melted' again. Leaving the melted chocolate and gelatine to cool, I started on the mixture portion. Mary called for 'full-fat soft cheese' so I interpreted that as cream cheese for over here. I then separated the eggs, you needed to keep the whites and yolks separate in this recipe. So, I beated the cream cheese, egg yolks, and white sugar with my hand mixer. I then spooned in the sour cream and slightly cooled chocolate and mixed with a wooden spoon. I beated the egg whites until white and frothy/bubbly, and folded it into the cheese mixture with a large, deep metal spoon to try and keep the air in. I added in the finely chopped ginger, and the brandy...she insists you can add more if you like! Oh dear, Mary Berry! But I decided to keep the amount she originally calls for, and it later proved to quite enough brandy for my family!  (I'll explain that later too!) I used a French brandy, this was the smallest bottle that I could find in the liquor stores! But I have noticed that Mary calls for brandy in other recipes too... I'm starting to think that she really likes brandy! :) Also, have a peek at how beautiful her cheesecake looks in the book... what I am aspiring to and hoping for! 


So folding in the brandy concluded the cheesecake mixture. I had high hopes! It looked and tasted good... so I poured it onto the ginger snap base and placed in the fridge to set. She didn't clarify how long to set exactly, so I kept it in the fridge overnight. 

I told all of you earlier how messy the kitchen at home becomes when I'm baking, and I think because I was feeling very flustered with this recipe, the 'dish situation' became much worse than usual! So, I will be brave and show you just how bad it gets! :) Definitely a new year's resolution!


The cheesecake looked as though it was almost set, but I stuck it in the freezer for around an hour or so before garnishing the top. I decorated the cheesecake with real whipped cream, chocolate curls, and a few slices of ginger. I added some icing sugar into the whipped cream, and I used a peeler on some room temperature eating chocolate to make the curls. I also sort of caramelized the ginger slices in some butter and demerara sugar in a saucepan on the stove.


As you can see, we ate the cheesecake in bowls! It sadly did not set like a proper cheesecake should, and so I knew I definitely got something wrong with the gelatine measurements. I think, for future references, 2 gelatine packets would have been correct. For me doing an encore recipe? I don't think so. And this mainly had to do with the difficultly I had with this recipe. The raw eggs in the mixture, added to the feeling of a 'mousse' to my attempt at this recipe. It was indeed very mousse-like. It did have a nice flavour... you could taste the brandy for sure! But it turned into a very messy cheesecake where we needed spoons. I definitely did at least one, if maybe not a few things wrong in this recipe. The proper tin size would also have made a huge difference. 

My family, within 1/2 an hour, was extremely giddy...and I knew it wasn't from the artificial wine/ sparkling grape juice we had at dinner. It was the brandy cheesecake. So if anything, it put us all in a great mood for the new year! Thanks Mary Berry. :)

I hope you enjoyed reading along! I had fun with this recipe... a challenging one, and one I know would be amazing if done properly! I am still not sure yet how to do that... and won't be attempting any time soon. But maybe by the time I'm through the book, I'll have things figured out to try it again. 

Happy new year everyone, I hope it is everything you wish it to be. x

So, I will end with "Ready, Set, BAKE!"

~*Next Bake Coming Soon*~